# Webpack build progress information
> "webpack-dashboard" is a webpack plugin that shows detailed information about module size, progress, errors, and assets in the development environment. It was created by Formidable, and there are several ways to install and use it.
- Canonical URL: https://marcelocarmona.com/webpack-building-progress-information
- Language: English (en-US)
- Published: 2016-09-05
- Tags: Webpack, Javascript
- Other languages: [Espanol](https://marcelocarmona.com/es/webpack-informacion-del-build)
---
When we use webpack to generate our bundles, it is often convenient in our development environment to show information about the size of each module, the bundles themselves, the time the process takes, and whether we are transpiling code through Babel or using PostCSS to preprocess our style sheets.
The current options for showing this information are provided through webpack plugins. I will show three simple alternatives for displaying this type of information.
# webpack-dashboard
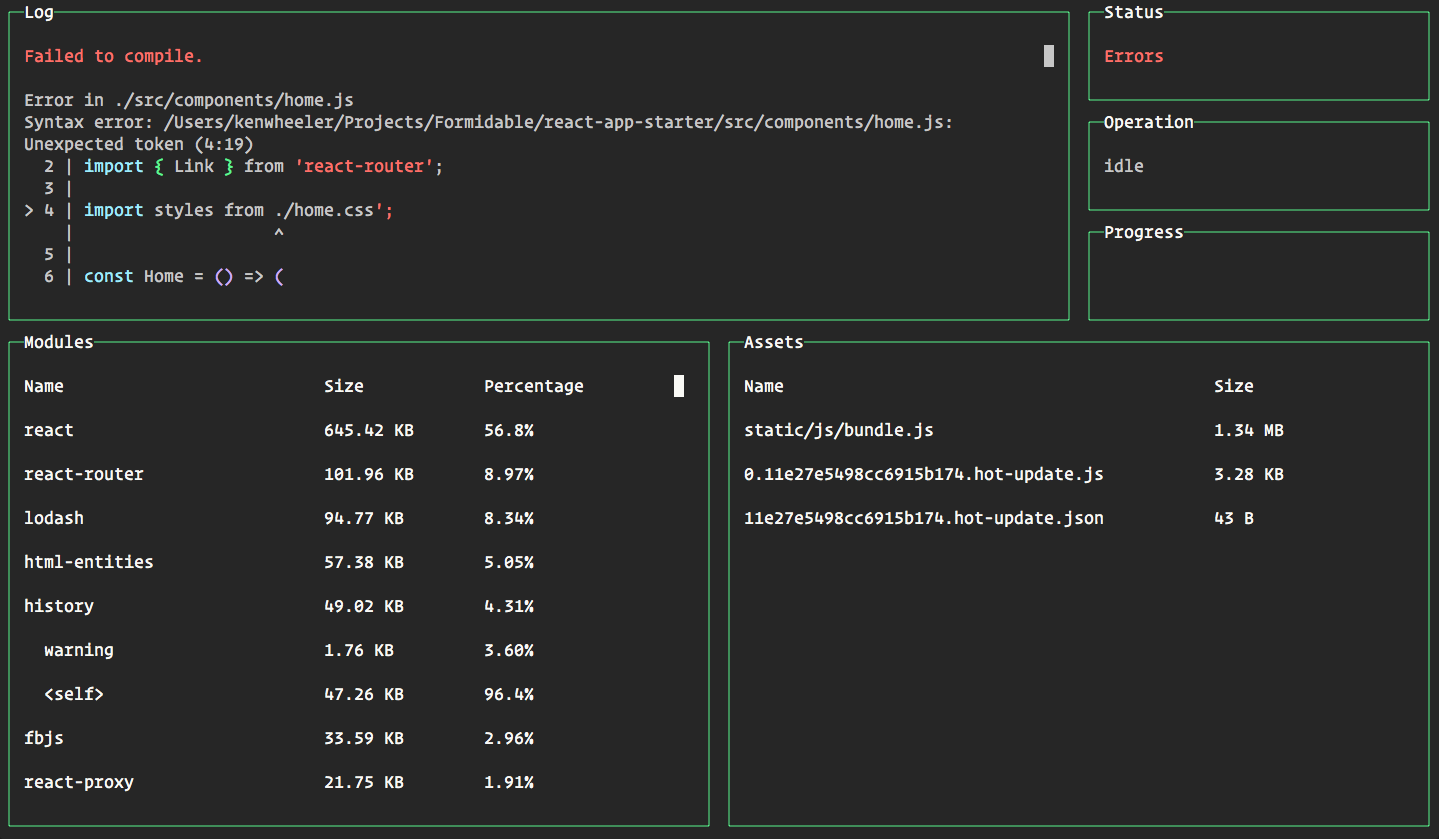
This dashboard was created by formidable.com, and it is a good option that shows information about:
- **Log**: the error log of the build process
- **Status**: status of the build process
- **Operation**: shows the specific operation that is performed in the build process
- **Progress**: live building progress
- **Module**: a list of your modules, their size, and their percentage with respect to the size of the bundle
- **Assets**: list of generated assets
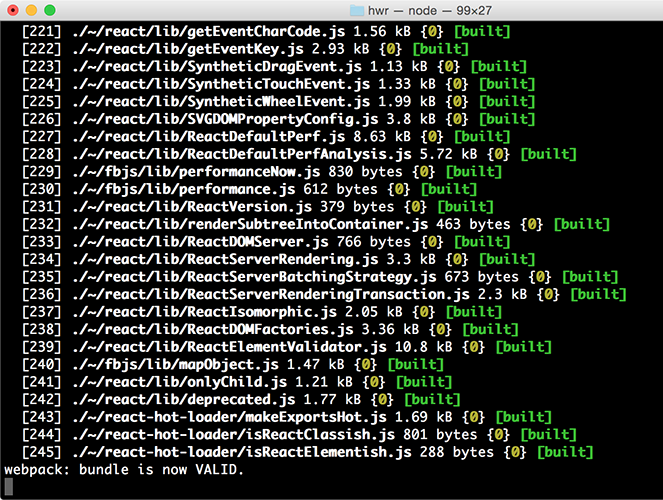
If you normally use webpack with `webpack-dev-server` or `webpack-dev-middleware`, you will be used to seeing something like this:
`webpack-dashboard` was created by Ken Wheeler. It looks like this :)
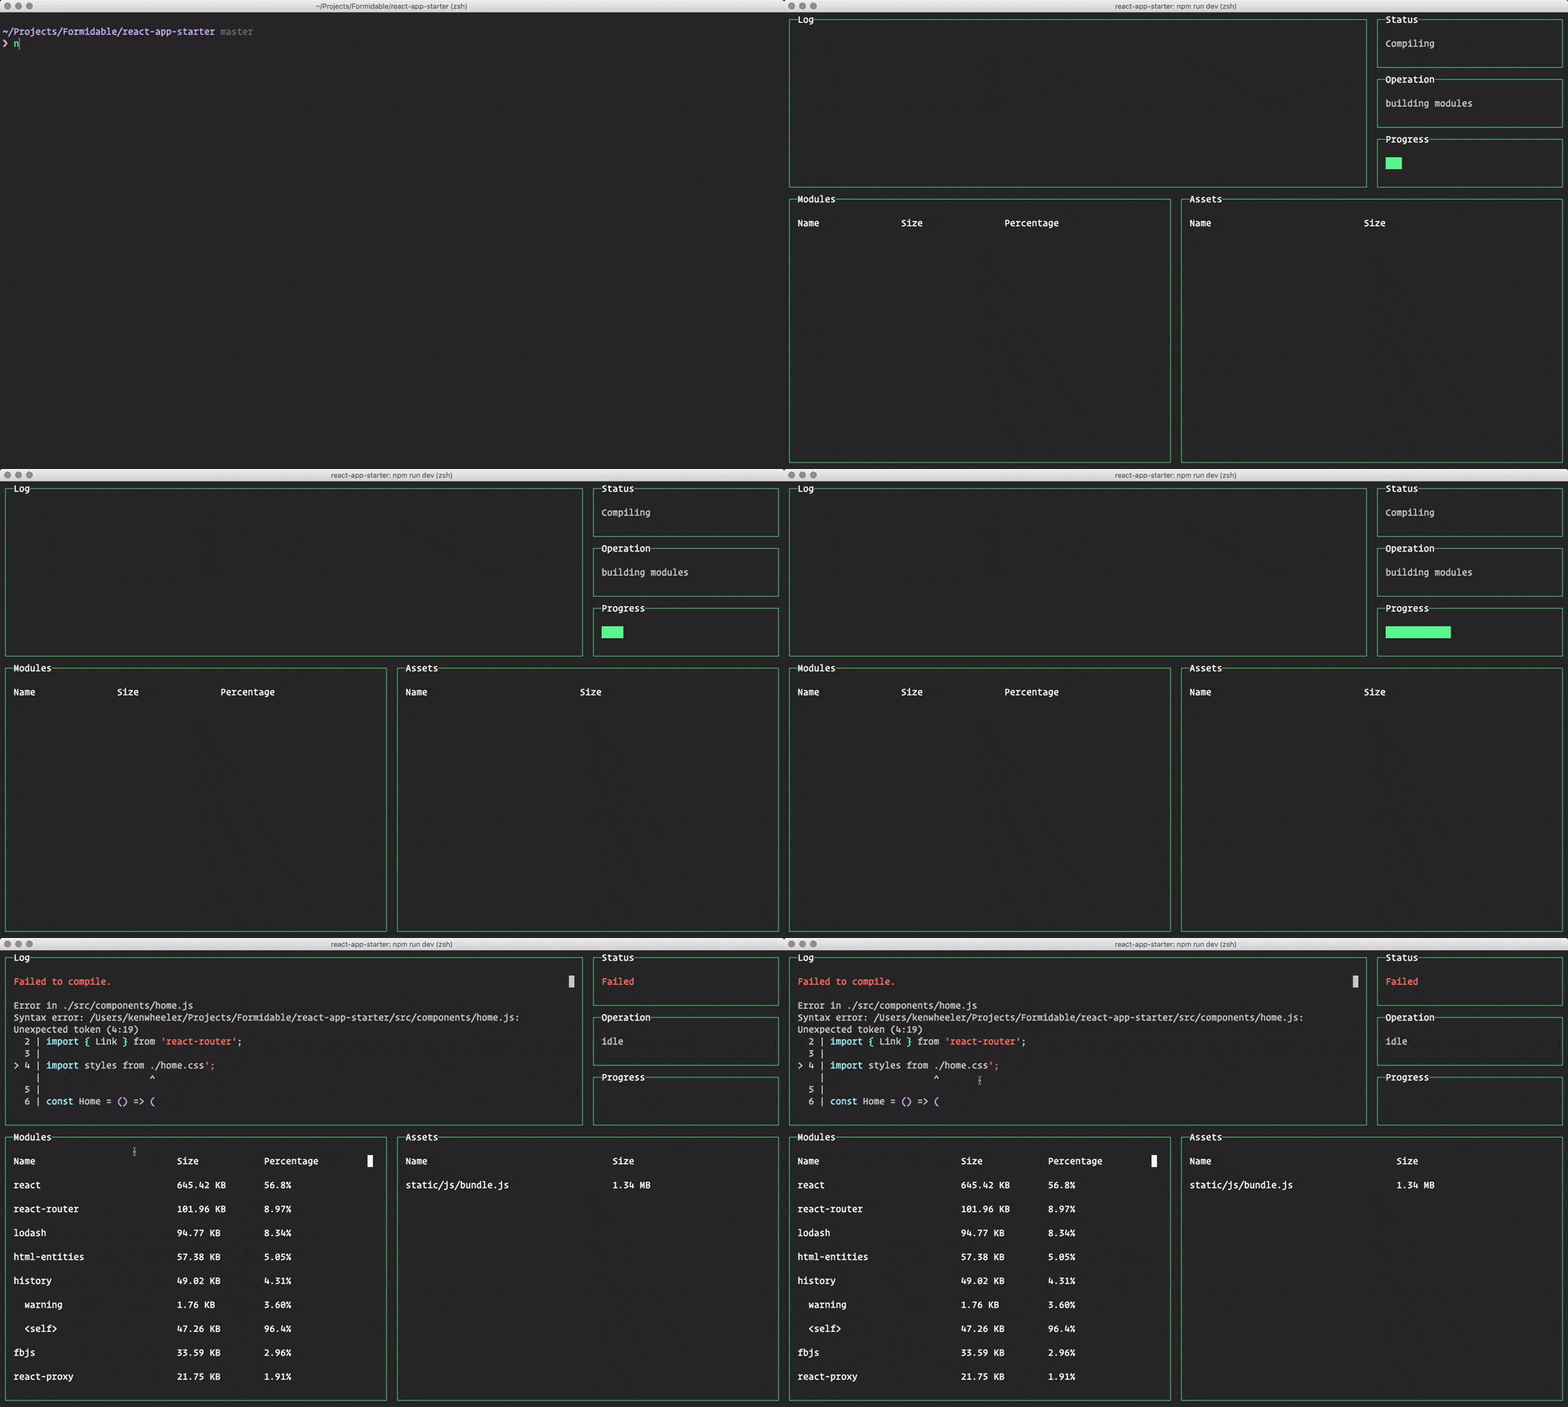
Here you can see it in action:
Installing it is quite simple:
```bash
npm install webpack-dashboard --save-dev
```
Then we add the plugin to our webpack configuration:
```javascript
// Import the plugin:
var DashboardPlugin = require('webpack-dashboard/plugin')
// If you aren't using express, add it to your webpack configs plugins section:
plugins: [new DashboardPlugin()]
// If you are using an express based dev server, add it with compiler.apply
compiler.apply(new DashboardPlugin())
```
Now we have to call `webpack-dashboard` from our package.json.
If your dev server looks like this:
```javascript
"scripts": {
"dev": "node index.js"
}
```
We must change it to this:
```javascript
"scripts": {
"dev": "webpack-dashboard -- node index.js"
}
```
For more configuration information, you can see the project on GitHub.
As I said before, I think the proposal of having a dashboard to obtain relevant information about our projects is very good.
Here I leave some tweets that were written at the time of its release.
_[Interactive component: blockquote — see the HTML page]_
— Formidable (@FormidableLabs){' '}
August 15, 2016

_[Interactive component: br — see the HTML page]_
_[Interactive component: blockquote — see the HTML page]_
— Ken Wheeler (@ken_wheeler){' '}
August 14, 2016

_[Interactive component: br — see the HTML page]_
_[Interactive component: blockquote — see the HTML page]_
— Ken Wheeler (@ken_wheeler){' '}
August 13, 2016

_[Interactive component: br — see the HTML page]_
_[Interactive component: blockquote — see the HTML page]_
— Dan Abramov (@dan_abramov){' '}
August 16, 2016

_[Interactive component: br — see the HTML page]_
# webpack progressBar plugin
This is another option that is quite simple, but when you work on a large project and the build time increases, even showing a progress bar improves the developer experience a lot.

_[Interactive component: br — see the HTML page]_
To install it we need to execute:
```bash
npm install progress-bar-webpack-plugin --save-dev
```
Then add it as a plugin in our webpack configuration file:
```javascript
var ProgressBarPlugin = require('progress-bar-webpack-plugin');
...
plugins: [
new ProgressBarPlugin()
]
```
You can see the project in github to see more configuration options.
# webpack progress plugin
And finally, if you want to have something even simpler or more custom, we can use the ProgressPlugin provided by webpack.
It is basically inserted as a plugin in our webpack configuration file.
```javascript
new webpack.ProgressPlugin(function handler(percentage, msg) {
/* ... */
})
```
We can use this hook to show progress information, where the percentage is a value between 0 and 1 that indicates the completeness of the process.
For example, we can use it in the following way:
```javascript
new webpack.ProgressPlugin((percentage, msg) => {
process.stdout.clearLine()
process.stdout.write(` \u00BB building bundles: ${(percentage * 100.0).toFixed(2)} % => ${msg}\r`)
})
```
In this case, I want to show the information in a single line, so I use `\r`.
And this example can look like this:

---
Site entrypoint for agents: [llms.txt](https://marcelocarmona.com/llms.txt) · [llms-full.txt](https://marcelocarmona.com/llms-full.txt) · [ai-index.json](https://marcelocarmona.com/ai-index.json) · [sitemap.xml](https://marcelocarmona.com/sitemap.xml)
Every HTML page on this site also serves this Markdown representation via
`Accept: text/markdown`, or by appending `.md` to the URL.